The Table Seating tool helps you visually assign guests to tables for your event. Instead of manually typing table names, you can use an interactive seating chart to organize guests quickly and clearly.
This feature becomes available after you create a Ticket Page, since table seating is designed for ticketed guests. Available with a Full Suite license.
Quick Overview/Tutorial 🎥 ⬇️:
⚙️ Accessing & Activating the Table Seating Page
Once your event has an active Ticket Page, you can access the seating chart.
-
Go to Event Tickets in the admin menu.
-
Click Table Seating.
- When the Table Seating - First Time Use dialog appears, choose how you'd like to proceed:
- Start Fresh: Clears all existing table name data and gives you a blank canvas to build your seating chart from scratch.
- Import Existing Assignments: Automatically creates tables based on existing table name data already tied to your guests and bidders, preserving those assignments.
- Select the option that fits your setup by clicking the radio button next to it.
- Click Activate Seating Chart to confirm and turn on the feature.

- Once activated you will see a message in the upper right letting you know the activation has been successful.
⚠️ Choosing Start Fresh will clear all existing table name data. This cannot be undone. If your guests or bidders already have table assignments saved, select Import Existing Assignments instead to preserve that information.
Not sure which option to pick? If this is a brand new event with no prior table data, go with Start Fresh. If you've already been managing table assignments elsewhere in ClickBid, choose Import Existing Assignments to avoid re-entering everything manually.
The seating tool will open and display:
-
Option to upload a Floor Plan or use the blank white screen
- Toggle between Unassigned Guests and All Guests, including those already assigned as bidders.
- Unassigned means not yet assigned to a table.
-
Tools for assigning guests to tables
- Seating Stats
- Total Guests
- Assigned
- Unassigned
- Total Tables
- Full
- Empty
- Partially filled
- Total Guests
- Print
- This option allows you to print your floor plan which includes the below information:
- Seating Stats
- Total Guests
- Assigned
- Unassigned
- Total Tables
- Full
- Partially filled
- Total Guests
- Guest List by table
- Table Name/Number
- Guest Name
- How many guests are at the table
- Seating Stats
- This option allows you to print your floor plan which includes the below information:
- Creating a Table (circle or square/rectangle)
- Click on the +Table (default is a circle table)
- If you need to change the table name or shape double click the center of the table and a box will display:
- If you need to change the table name or shape double click the center of the table and a box will display:
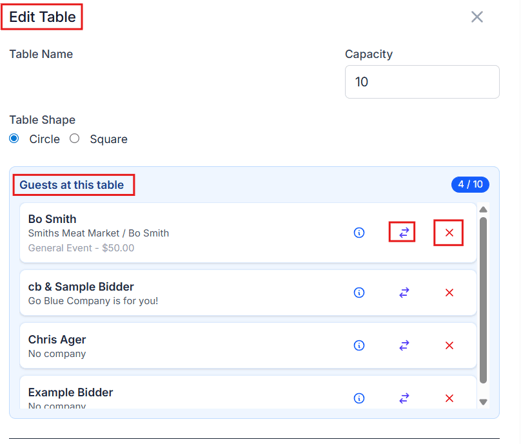
- Edit table options:
- Table name
- Capacity
- Table Shape
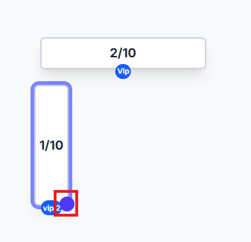
- Circle (default shape) can be resized to larger circles by using the solid outer circle. Single click to display the small outer circle

- Square table can be reshaped to vertical and horizontal tables using the solid outer circle. Single click to display the small outer circle
- The tables can be rotated by clicking the table and grabbing the circular arrows icon to move direction.

- Circle (default shape) can be resized to larger circles by using the solid outer circle. Single click to display the small outer circle
- Click on the +Table (default is a circle table)
To change a square table into a horizontal rectangle, drag the small outer circle to the right to expand the shape.
To make the table vertical, first adjust it back into a square, then drag the small outer circle downward to reshape it.
-
-
- Guests at this table
- click the info bubble on the guest record will display:
- Guest Name
- Company name
- Ticket Page purchased from
- Purchasers name
- Custom questions (ticket purchase and guest questions)
- the arrow icon will allow you to move the guest to a different table
- the X is to delete the guest from the table.
- click the info bubble on the guest record will display:
- Guests at this table
-


-
-
- Add guests to this table
- Search by name or company
- Add guests to this table
-

All guests from all ticket pages will appear in the seating tool. You can search by Ticket Page if your event has multiple ticket pages.
👥 Viewing Guests Without Tables
The seating page shows a list of guests who have not yet been assigned to a table.
Guests appear:
-
Grouped by ticket purchaser
-
With company name displayed (if provided)
-
From all ticket pages combined
This makes it easy to seat guests who purchased multiple tickets together.
🪑 Assigning Guests to a Table
Guests can be assigned to tables individually or in groups using drag-and-drop from the Guests list.
To add a guest to a table from table seating:
- Assign a Single Guest to a Table
-
Locate the Guests list on the far right side of the screen.
-
Find the guest you want to assign.
-
Click and hold the guest’s name.
-
Drag the guest to the desired table.
-
Release to drop the guest onto the table.
-
- Assign Multiple Guests to a Table
-
In the Guests list, click each guest you want to assign to the same table.
-
Once the guests are selected, click and drag them toward the desired table.
-
Drop them onto the table to assign them together.

-
- Fix an Incorrect Table Assignment: If a guest is added to the wrong table
-
Click the center of the table where the guest is currently assigned.
-
Find the guest in the table’s guest list.
-
Choose one of the following options:
-
Click the Move icon to move the guest to another table.

-
Click the Red X to remove the guest from the table.

-
-
From Bidders> Manage Bidders
-
Click on a guest without a table assignment.
-
The Choose Table window will appear.
-
Select an existing table from the dropdown list.
-
The guest will immediately be assigned to that table.
From Event Tickets>Manage Guests
-
Click on a guest without a table assignment.
-
The Choose Table window will appear.
-
Select an existing table from the dropdown list.
-
The guest will immediately be assigned to that table.
➕ Creating a New Table from Table Seating, Manage Bidder, & Manage Guests
If the table you need does not exist yet, you can create one during the seating process.
Table Seating:
-
Navigate to the Table Management section.
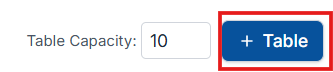
- Set the Table Capacity to the amount allowed per table
- click the +Table button
- To Edit the table name click on the table that was just created.
- From the popup enter the new table name.
Manage Bidders:
-
Navigate to Bidders>Manage Bidders>select the table for the guest you need to add.
-
Click Add to a new table.
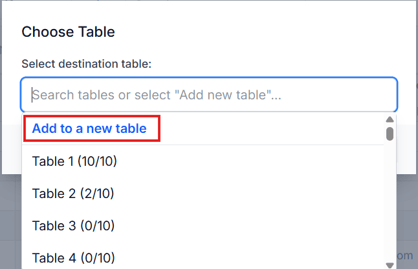
-
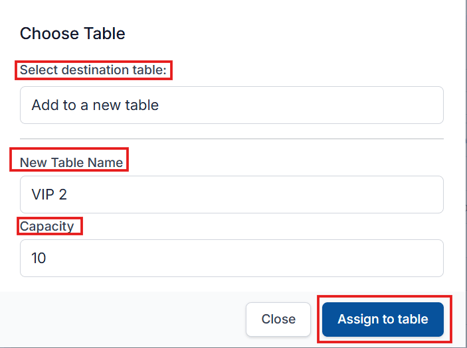
Enter a Table Name.
-
Set the Capacity (number of seats) available at the table.
-
Click Assign to table to create the table and place the bidder at that table.

Manage Guest:
-
Navigate to Event Tickets>Manage Manage Guests>select the table field for the guest you need to add.
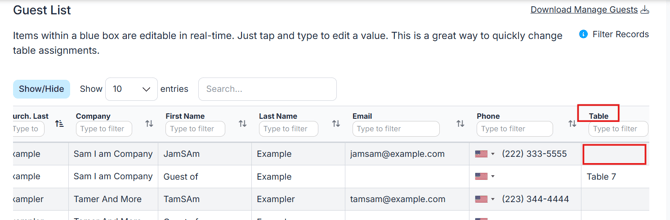
-
Click Add to a new table.
-
Enter a Table Name.
-
Set the Capacity (number of seats) available at the table.
-
Click Assign to table to create the table and place the guest at that table.
👥 Managing Bidder-Only Registrations (No Tickets)
If you allow users to register to bid without purchasing a ticket, they will be created as bidders only, not as guests from the ticket page.
To keep these bidders organized and easy to identify, you can adjust your bidder settings and seating assignments.
🔢 Set a Separate Bidder Number Range
- Go to Software Settings → Auction Settings → Bidder Settings.
- Locate the Starting Bidder Number field.
- Enter a number that is separate from your ticketed guests.
- Example: Start bidder-only registrations at 5000
This helps distinguish bidder-only participants from ticket purchasers.
🪑 Organize with a Dedicated Table
To further organize bidder-only participants:
- Create a table such as:
- “Non-Attending Bidders”
- “Bidder Only-Not Attending”
- Assign bidder-only users to this table
Using a separate table and bidder number range keeps non-attending bidders clearly identified and prevents confusion during check-in, reporting, and event management.
✏️ Editing Table Assignments
If you need to update a table’s details:
-
Locate the table you want to update.
-
Click the Edit option for that table.
-
Update the table name, number, or seat count as needed.
-
Click Save to apply the changes.
Important: Table names can only be updated from the Table Seating page.
This option is not available in Manage Bidders or Manage Guests. This restriction helps prevent table names from being accidentally changed while managing guests or bidders.
You can also adjust seating assignments at any time.
From areas like:
-
Manage Guests
-
Manage Bidders
-
Butler
If a guest is connected to a registered bidder, the bidder’s name will appear automatically when viewing the guest record.
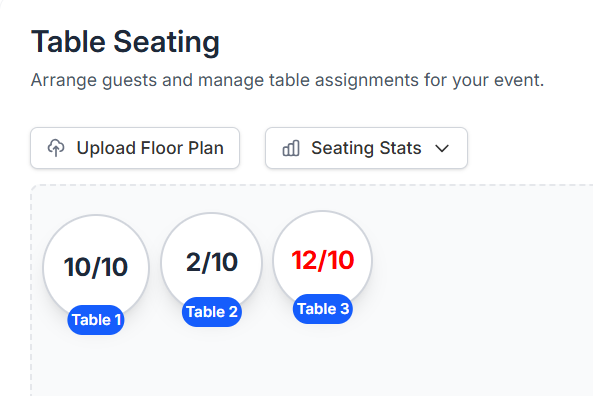
👀Viewing Table Capacity
Table capacity helps you track how many guests are assigned to each table and how many seats remain available.
Check Available Seats
-
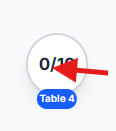
Locate the table in the Table Management layout.
-
Each table displays the number of assigned guests and total seats available.
This allows you to quickly see:
-
Which tables are full
-
Which tables have open seats
-
Where additional guests can be assigned
Manage Seating Limits
If a table reaches its seating capacity, you may need to:
-
Move guests to another table
-
Increase the table seat count by editing the table
-
Create additional tables to accommodate more guests
Monitoring table capacity ensures guests are evenly distributed and helps prevent overcrowding.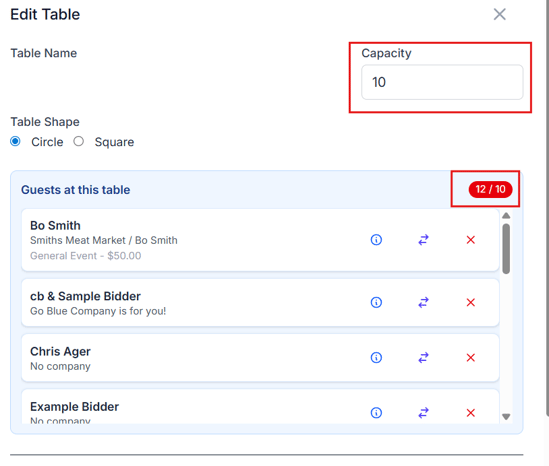
🖨️Printing the table seating floor plan, including tables and assigned guests, is not available at this time. We are continuing to improve this feature.
👀Viewing and Editing Guest Information
You can view guest details at any time from the Guests list or from within a table.
View Guest Information
-
Locate the guest in the Guests list or within a table.
Guest List: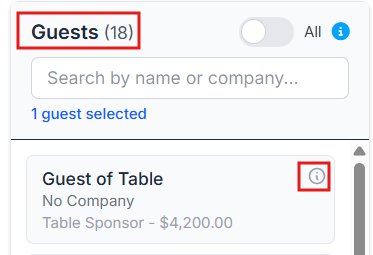
Edit Table: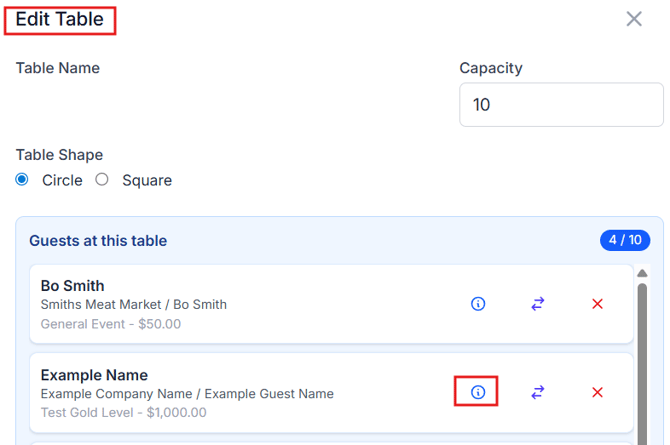
-
Click on the info icon in the guest’s name block.

-
The guest’s profile will open, displaying their information such as:
-
First and Last Name
-
Company Name (if applicable)
-
Ticket/Sponsorship name
-
Purchasers Name
-
Custom Questions (if applicable)
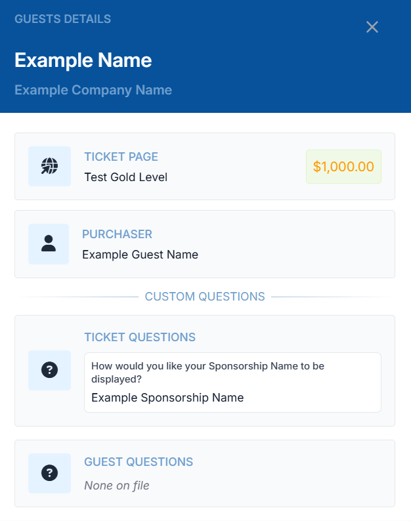
-
This allows you to quickly review guest information during event setup or from the butler during check-in.
Edit Guest Information
If you need to update a guest’s details:
-
Go to Event Tickets>Manage Guests.
Updates will automatically reflect throughout the event system.
⚠️When updating guest information in Manage Guests, any changes to first name, last name, email, phone, or table will also update in Manage Bidders if that guest has been converted into a bidder.
When updating information in Manage Bidders, only the bidder number and table will sync back to Manage Guests.
For this reason, it’s best to update guest details from Manage Guests to ensure all information stays accurate.
📋 Copying Table Seating from One event to a New Event
If your organization runs recurring events, you can copy an existing floor plan or table seating layout from a previous event when creating a new event.
Steps to Copy Table Seating
-
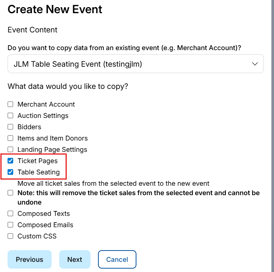
When creating a new event, go to the Event Content section.
-
Select the event you want to copy information from.
-
Choose all the data you would like to copy into the new event
-
When you reach the Ticket Pages step, make sure to also select Table Seating.
-
Continue completing the event setup.
Guest assignments are not copied, so you can start fresh with new attendees.
🔐 Permissions for the Table Seating option
Permissions for Updating Table Seating
Access to update table seating may depend on your user permissions within the system.
To update table seating from different areas of the platform, you must have the appropriate permissions enabled.
Required Permissions
To update table seating from the following areas, you must have permission to:
-
Manage Bidders
-
Butler
-
Manage Guests
These permissions allow you to modify table assignments from those sections of the platform.
Table Seating Page Permission
The Table Seating permission only grants access to the Table Seating page itself.
This permission allows users to view and manage seating directly from the table layout but does not grant access to update seating from other areas such as Manage Bidders, Butler, or Manage Guests.
The seating tool is not available in the Essentials package.
🚫 How to Deactivate Table Seating
- On the Table Seating page, click the three-dot menu (⋮) in the upper right corner of the page.
- Select Deactivate Table Seating from the dropdown.
- A dialog will appear asking how you'd like to proceed. Choose one of the following options:
- Retain Assignments: Table name data will be written back to each guest record. You can reactivate later and import these assignments.
- Reset All: All floor plan and table name data will be cleared from guest records.
- Select the option that fits your needs, then click Deactivate Seating Chart to confirm.
- To cancel without deactivating, click Cancel.
⚠️ Deactivating is designed as a way to revert to manually typing in table numbers, not as something to toggle back and forth. If you deactivate and later reactivate, any table changes made to bidder records through Manage Bidders will not be preserved. Only changes made through Manage Guests carry through deactivation and reactivation. If there's any chance you'll reactivate, make all table assignment updates through Manage Guests whenever possible.
🧾 Activity
If another user is editing the seating chart at the same time, the system will alert you to prevent changes from being overwritten.