
Follow these steps to create a single auction item:
- Go to the Items tab.
- Click Manage Items.
- Select Add Item.
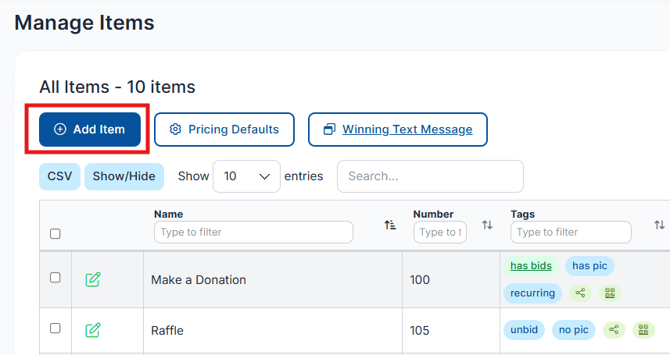
- Enter all relevant item details (name, value, description, etc.).
To save your Description & Exceptions, be sure to click outside of the content editor box and confirm you see “Data Saved” in the upper right corner of the screen. If you do not see this message, your changes may not be saved.
⚙️ Important Item Settings
When adding or editing an item, pay close attention to these key settings:
- Status
- Active – Item is available for bidding when the auction is open. If the auction is closed, the item is still viewable in preview.
- Closed – Item is no longer open for bidding but can still be viewed.
- Invisible – Item is completely hidden from the bidding site and preview but remains visible in the Butler (admin view).
- Closing Time
- Determines exactly when bidding ends for the item.
- At this time, the item automatically switches from Active to Closed, and a winning bidder is selected.
- Description and Extras
- Add a clear description and any special notes or exceptions related to the item.
-
To save your Description & Exceptions, be sure to click outside of the content editor box and confirm you see “Data Saved” in the upper right corner of the screen.
If you do not see this message, your changes may not be saved.
The Invisible status is helpful for items you’re still preparing or don’t want bidders to see yet.
👥 Adding Donor Information
To associate a donor with an item:
- Navigate to the Donor Information section within the item.
- Click Create Donor.
- Enter the donor’s details.
📄Using the Item Template
ClickBid’s Mass Import tool allows you to quickly upload auction items in bulk using a spreadsheet template. This saves time, reduces errors, and makes it easy to organize your auction by categories and item numbers.
⚙️ How to Download & Prepare the Item Import Template
📥 Step 1: Download the Item Import Template
- In the left-hand navigation, click Items to expand the menu.
- Click Manage Items.
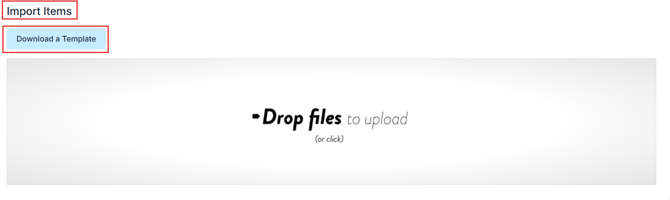
- Scroll down to the Import Items section.
- Click Download a Template to save the spreadsheet to your computer.
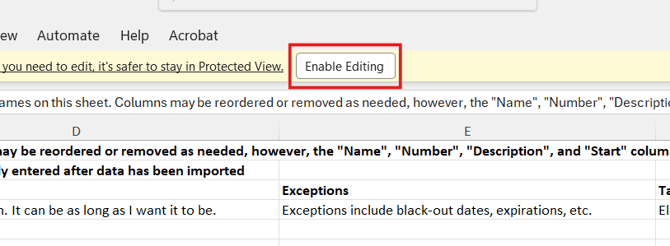
- Open the file and click Enable Editing if prompted.
ℹ️ You must use the ClickBid Item Import Template for uploads. Spreadsheets built from scratch or in a different format will not import correctly.
📝 Step 2: Fill Out the Template
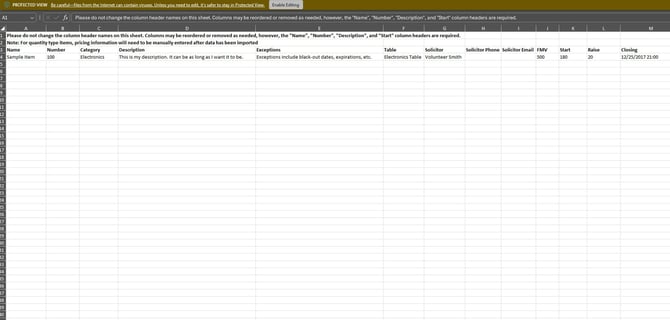
The template includes the following columns. The four required columns are marked below, everything else is optional but recommended.
| Column | Field | Notes |
|---|---|---|
| Name | Item Name | Required. Limited to 53 characters. |
| Number | Item Number | Required. Must be unique per item. |
| Description | Description | Required. No character limit. |
| Start | Starting Bid | Required. Defaults to 1.00 if left blank. |
| Category | Category | Groups items on the bidding site. |
| FMV | Fair Market Value | Displays as Priceless if left blank. |
| Raise | Bid Increment | Defaults to 1.00 if left blank. |
| Type | Item Type | Enter: silent, live, donation, quantity, blind, credit, or info. Required for pricing defaults to apply. |
| Buy Now | Buy Now Price | Optional. |
| Taxable | Taxable | Enter Yes/No or 1/0. |
| Tags | Custom Tags | Separate multiple tags with commas. |
| Donor Name | Donor Name | Donor's first and last name. |
| Donor Display Name | Donor Display Name | Name shown publicly to bidders. |
| Columns Y - AJ | Donor contact and item info | Address, phone, email, donated item, FMV, notes. |
ℹ️ Item names longer than 53 characters will display with "..." on the bidding site. The full name still appears when bidders tap the Bid/Info button. Keep names short and place additional details in the Description field.
⚠️ Item Status cannot be set via the import template. After uploading, you will need to set each item's status manually in Manage Items. Active = visible and open for bidding. Closed = visible but not available for bidding. Invisible = hidden from bidders.
🔢 Step 3: Plan Your Item Numbers
Thoughtful item numbering makes your auction easier to manage, especially when adding items later.
Start item numbers at 100 or higher to take advantage of auto-indexing, ClickBid will automatically assign the next available number when you add items in the future. Grouping items by hundreds keeps categories together and easy to navigate.
A common numbering approach:
- Sports items: 100s
- Travel items: 200s
- Entertainment items: 300s
- For Her items: 400s
- For Him items: 500s
- Baskets: 600s
💡 Items without a category assigned will display first on the bidding site by default. You can control how categories and items are sorted under Items > Categories and Ordering.
💾 Step 4: Save Your File
Before uploading, save your completed spreadsheet as CSV UTF-8 format for the best import results.
ℹ️ If you need to import items in multiple batches, always start with a fresh, blank template for each upload. Re-uploading a previously used template can create duplicate items.
🚀 Step 5: Upload Your Items
- Go to Items > Manage Items.
- Scroll down to the Import Items section.
- Drag and drop your saved CSV file into the upload area, or click to browse and select it.
- Follow the on-screen prompts to complete the upload.
Once the import is done, your items will appear in the All Items table. You can also find your import listed in the Previous Imports section, where it can be removed as long as no bids have been placed on any item in that import. Keep in mind this will remove all items from Manage items that were on that template.
✏️ Step 6: Adjust Item Numbers After Import (If Needed)
Change a Single Item Number
- Go to Items > Manage Items.
- Click directly on the item number in the table to edit it.
- Enter the new number and save.
⚠️ Item numbers cannot be changed once bids have been placed on that item. You can only use numbers that are not already assigned to another item.
Batch Renumber Multiple Items
- Go to Items > Manage Items.
- Check the boxes next to the items you want to renumber.
- Scroll down to the Batch Update section.
- Check the box next to Item Number.
- Enter your desired starting number.
- Click Update. ClickBid will auto-index from the number you entered, assigning the next available numbers in sequence.
✅ Import Checklist
- Name, Number, Description, and Start are filled in for every row
- Item numbers are unique and start at 100 or higher
- Item Type is specified if you want pricing defaults to apply
- File is saved as CSV UTF-8
- A fresh template was used for this import