
After a sale is submitted through your ticket page, you can view, print, and resend receipts and invoices, issue a refund, or switch an existing unpaid sale to an invoice to allow the purchaser a more flexible payment option.
Tip: Use this tool during check-in to quickly assist guests who’ve lost or never received their original email receipt!
-
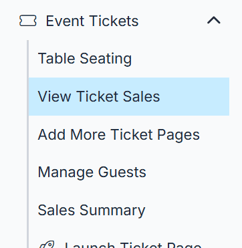
Click on Event Tickets in the left-hand navigation menu.
-
Click on View Ticket Sales to open your list of ticket buyers. If you have more than one ticket page, this will say View All Ticket Sales.
-
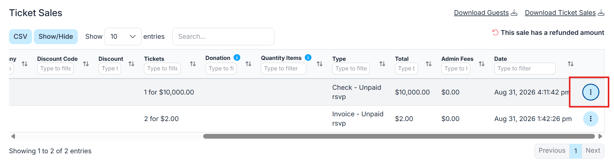
Find the buyer you need, then scroll to the right and click the blue dropdown menu icon with three dots next to their name to expand their ticket details.
-
You’ll now see a dropdown menu with a few actions available:
-
Switch to Invoice - this will switch an unpaid sale to the invoice option and generate an invoice that is emailed to the purchaser.
-
-
-
Refund - Issue a full or partial refund. Click here for the best practice.
-
View Receipt - opens the receipt in a new window where you can print or download the file.
-
Email Receipt - resends the receipt to the purchasers email on file.
-
Email Guest Update Link - this will send the email located under Event Tickets > Ticket Page Settings > Custom Content > Guest Update Link Email Message and automatically include their unique guest link at the bottom of the email.
-
Email Invoice - resends the invoice to the purchaser's email on file.
-
Always confirm the guest’s email address before resending a receipt to avoid confusion or misdelivery.