
Who Gets the Ticket Confirmation Email?
The Ticket Purchase Confirmation Email is automatically sent to:
-
✅ The guest who made the purchase
- The Event Support Contact
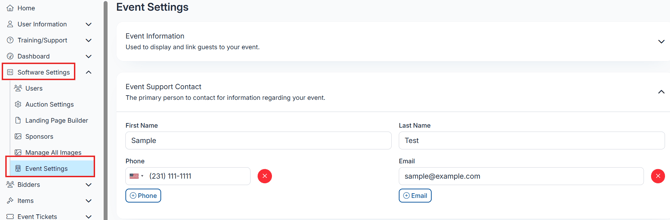
(when listed in Software Settings > Event Settings > Event Support Contact, and selected in Event Tickets > Ticket Page Settings > General Settings > Receipt Email Address)
Ticket Receipt Formats Available
ClickBid offers several ticket receipt variations depending on your configuration:
-
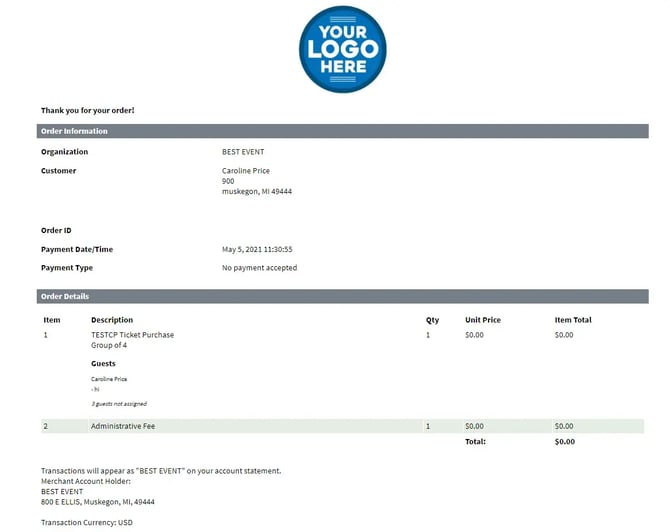
No FMV (Fair Market Value)
-
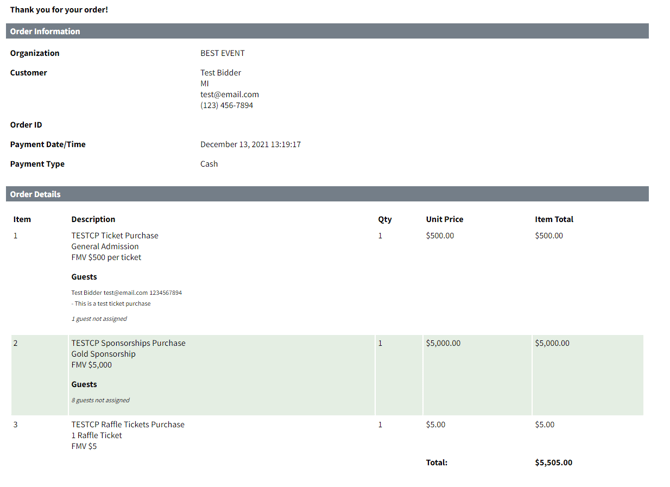
With FMV
-
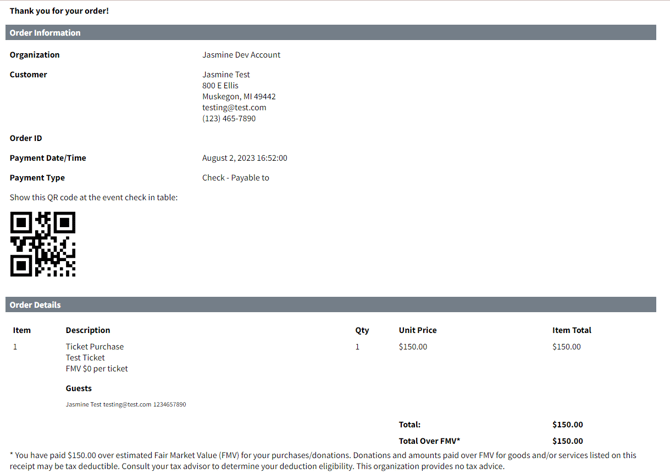
With QR Code
FMV should be included for tickets that provide goods/services (like meals or swag) to help guests with tax reporting.
Ticket Receipt with QR Code:
Ticket Receipt that shows FMV:
Ticket Receipt that does not show FMV:
How to Enable QR Codes on Receipts
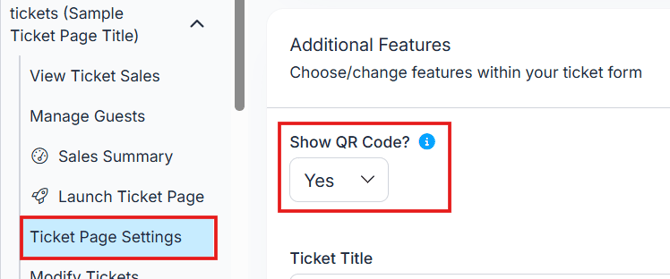
QR codes on ticket receipts allow fast and easy guest check-in. When scanned, the guest’s bidder profile will pull up in the Butler.
To enable QR codes:
-
Go to Event Tickets > Ticket Page Settings > Additional Features
-
Toggle on Show QR Code
Make sure your volunteers are trained to use the Butler tool for scanning QR codes at the event.
How to Customize the Ticket Receipt
You can update both the top and bottom of your receipts to share helpful information.
Add info to the top:
-
Go to Event Tickets > Ticket Page Settings > Customizable Content
-
Edit the Receipt Header field
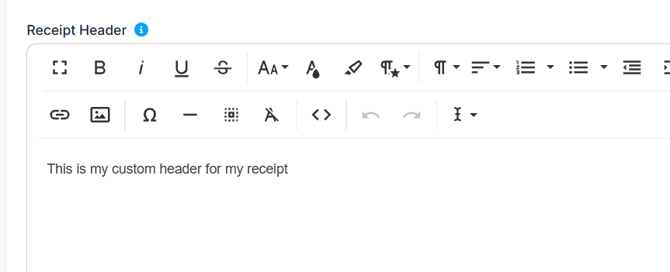
Use this space to include parking info, dress code, or day-of contact details.
Edit contact info at the bottom:
-
Navigate to Organization > Account
-
Edit the Address section
Don’t Change Ticket Names After Purchase!
Once a guest purchases a ticket, sponsorship, or underwriting item:
Do NOT rename that item.
Doing so will:
-
❌ Break reporting connections
-
❌ Disable the “Resend Guest Link” feature
-
❌ Lead to missing or inaccurate ticket data
Double-check your item names before publishing your ticketing page to avoid long-term reporting issues.
You’re All Set!
Now your receipts are customized, functional, and ready to support a smooth check-in experience for your event.