
🚀 How to Set Up Credit Card Payments
-
Go to Software Settings > Auction Settings > Payment.
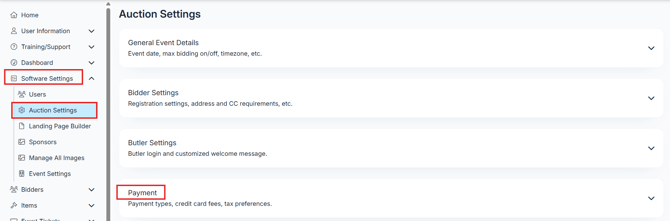
-
Click Merchant Registration
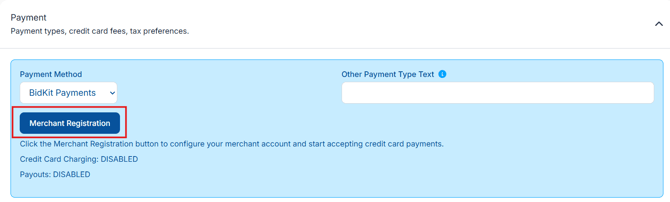
- First time users without a matching EIN/BIN will get a 'Confirm Address' upon clicking 'Merchant Registration'
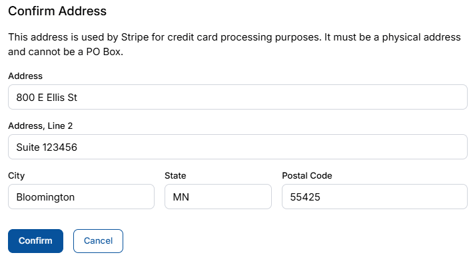
- Click Confirm
-
If you have an existing account with ClickBid, Upon clicking 'Merchant Registration' choose Yes, Use Same Account; Or you can select No, Use Different Accounts if you want payouts to go to a different bank account.
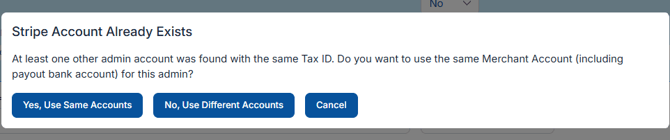
- Upon clicking either option above then confirm your business address
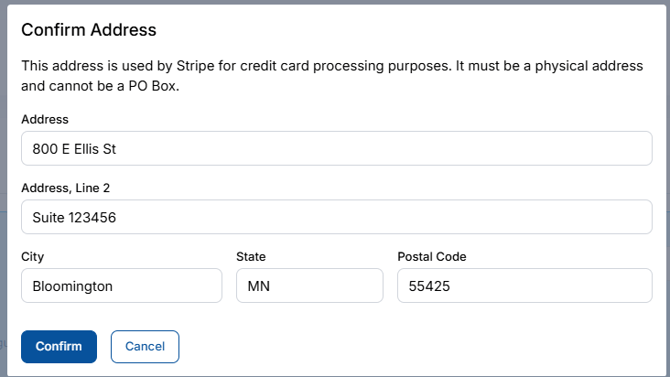
- Click Confirm
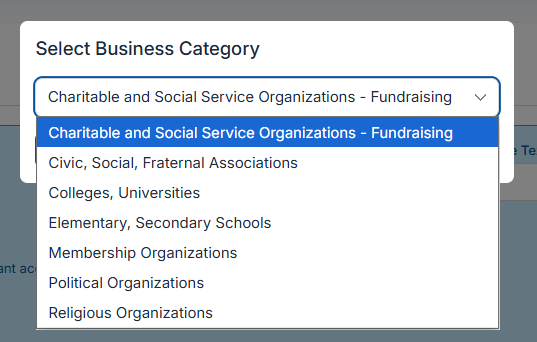
- Select Business Category from the list in the drop down, then click Submit
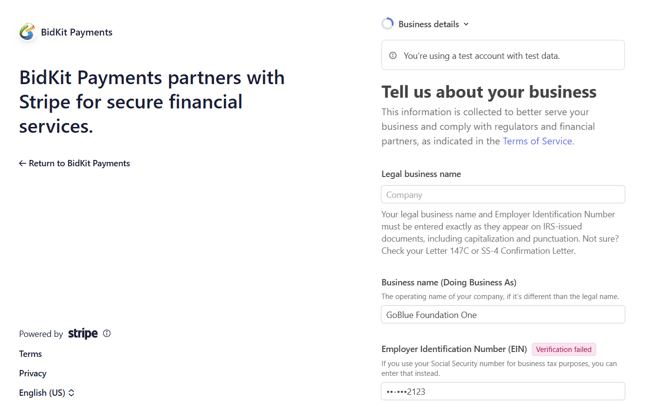
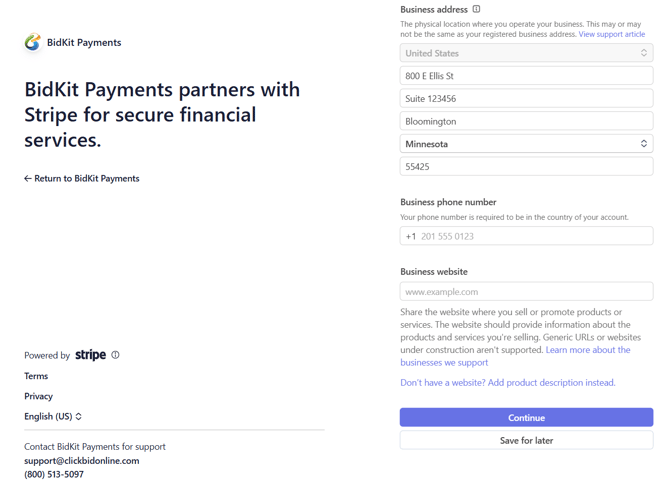
- Fill out the required Business details, then click Continue
-
Fill out your organization and responsible party details, including SSN/SIN of the responsible party's (SSN (US) or SIN (Canada). This is required for identity verification and compliance only.
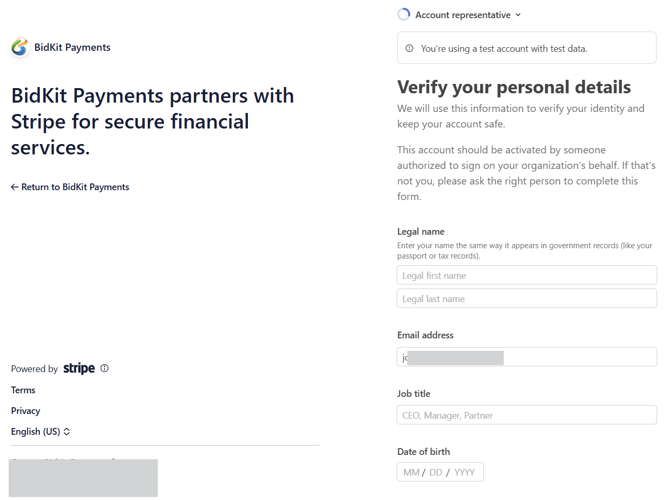
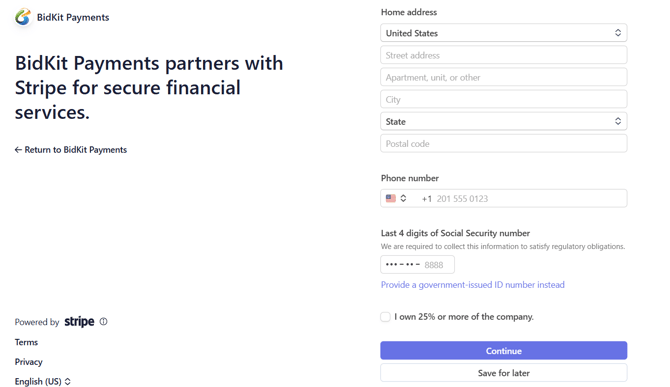
- Click Continue
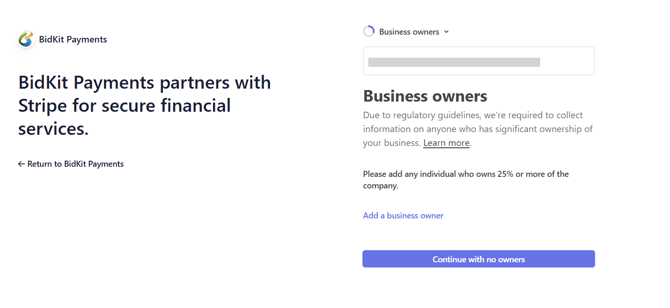
- Business Owners page, Add a business owner or click Continue with No Owner
- Review and Submit, review all the information is correct, you will not be able to submit the form until all sections are completed.
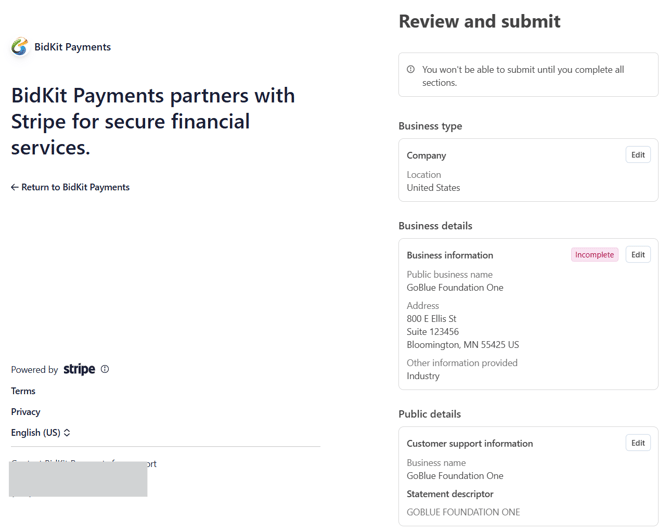
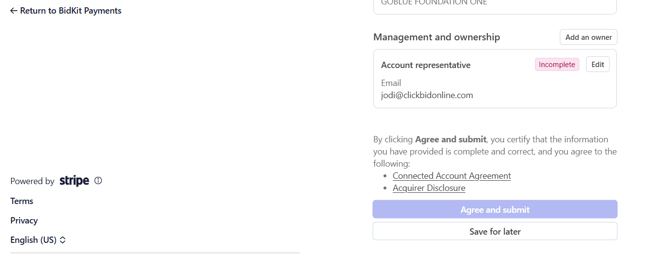
- Once everything is filled out and you no longer see the "incomplete' tag you can Click Agree and Submit
-
You will be returned to your event admin.
-
If you need to access the information again, go to Merchant Account → Generate Update Link, then click the link to open the Stripe form page.

🚨If you select “Save for later” at any point while completing the form, you can return to it by navigating to the left-side menu: Merchant Account → Generate Update Link. Click the link to open it in a new tab.
Please note that this is a one-time-use link and will expire after 5 minutes.
-
Make sure you add your Bank Account for weekly payouts. Go to Merchant Account>Bank Account Info, add your Bank Account & Routing Number for weekly payouts.
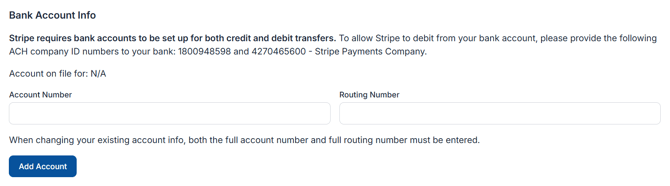
ℹ️ If you need to change or update your bank account information you will need to reach out to your Account Manager> From the Welcome page or by going to Training/Support>Request Support.
🔍 What Happens After You Submit
Once you submit your information, Stripe reviews your account. In most cases, the approval process is nearly instantaneous and most users will be able to accept payments right away. However, some accounts require additional review.
Document reviews can take up to 24 hours. In some cases, Stripe may take a few business days to fully verify and enable your account, especially if they need to confirm business details or request additional documentation.
Here is what to expect during the review process:
- Most accounts are approved quickly and can begin processing payments right away.
- Some accounts are flagged for a manual review. During this time, Stripe may pause payouts until the review is complete. This does not mean something is wrong. It is a standard part of their verification process.
- If Stripe needs more information, you will see a red banner in your ClickBid admin. Go to Merchant Account > Generate Update Link to access the form and provide what Stripe is requesting.
- If your account is under review, credit card charging may show as DISABLED on your welcome page until the review is finished.
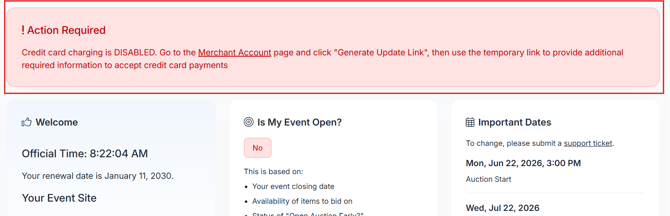
- Go to your Merchant Account page and located at the top is in Red is "Merchant Account Issues' that generally tells you everything that needs to be corrected/filled out. Then click on the Generate update Link>click the link> then fill out the missing details
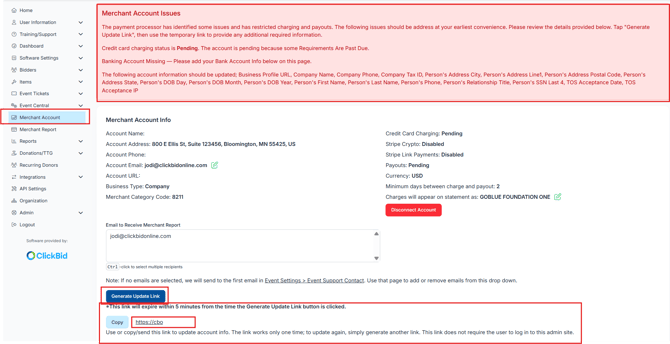
⚠️ If you see an "Action Required" message on your welcome page that says credit card charging is disabled, that is your signal that the merchant setup is not yet complete or that Stripe needs additional information from you. Do not wait until the week of your event to start this process. Give yourself at least one to two weeks before your event date, just in case a review is needed.
💳 Payouts & Holds Explained
-
First payout hold:
-
US Organizations: 7-day initial hold, then 2-day standard hold subsequent payouts.
-
Canadian Organizations: 7-day holds for all payouts.
-
-
Payouts occur weekly via ACH on Wednesdays.
-
You can request a different schedule or monthly payout on a case-by-case basis. If interested in adjusting payout dates, reach out to your Account Manager via Training/Support > Request Support.
- Instant Payouts are also available if your bank allows them up to $10,000 a day. For more information on Instant payouts please click here: How to Request and Instant Payout
- Please note: Bank holidays extend the standard two-business-day processing hold and may result in your funds being included in the following Wednesday’s payout. For a full list of bank holidays that may cause delays, click HERE.
💡Run a small test transaction before your event. This starts the 7-day initial hold clock early so your payout timing is not delayed during your event.
⚠️ A Note About Event Descriptions and Payout Reviews
Stripe reviews all accounts and transactions for compliance, and certain categories of goods or services can trigger an additional review or temporarily pause payouts. One example that has come up for ClickBid clients involves alcohol.
If alcohol appears to be included in the price of something processed through Stripe, such as a ticket that says "includes wine" or "open bar included," Stripe may flag the account and pause payouts while they review whether the merchant complies with regulations around selling alcoholic beverages. This can happen even if you are not actually selling alcohol through the system.
To avoid an unnecessary review, keep your event descriptions clear:
- If alcohol is available at your event but handled separately (cash bar, a different register, etc.), say so explicitly in your event listing. Something like "cash bar available" rather than "ticket includes wine" makes a clear separation that prevents a flag.
- If your organization does intend to sell alcohol directly through ClickBid and Stripe, please let your Account Manager know in advance so the review can be started early and does not delay your payouts.
ℹ️ If your payouts are ever paused or you receive an unexpected notice from Stripe, go to your Merchant Account page to see if there are more details. You can contact your Account Manager if you need further help so they can escalate internally and help resolve things much faster than going through general support channels.
🚨 This type of review is not common, and most organizations will never encounter it. But being thoughtful about how you word your ticket and item descriptions goes a long way toward keeping everything running smoothly.
🛠️ Setup FAQs & Troubleshooting
-
Can I connect my personal Stripe account?
No. ClickBid uses its own Stripe integration. You cannot connect an outside Stripe account. -
Payouts are not enabled. What do I do?
Click Update Merchant Account to return to the onboarding form and complete any missing steps. -
I am getting an IRS verification error.
Stripe may request documentation such as a Letter 147C to confirm your Tax ID. Upload documents directly through the Stripe form (Merchant Account>click Generate Update Link>Click the link then fill out the submit the forms from Stripes page by following the prompts on the page. Do not send them by email. -
My statement descriptor is showing an error.
Make sure your organization name in admin settings is at least 6 characters long - My Tax ID or company name is not matching.
An incorrect Tax ID or company name is one of the most common reasons Stripe cannot verify an account. Double-check both before submitting.
⚠️ Incorrect Tax ID or company name may prevent Stripe from verifying your account.
🔐 Security & Compliance
ClickBid is PCI compliant (SAQ-A) which means card data never touches our servers. Your donors' payment information stays secure throughout the entire process.
📊 What Shows on Your Statements & Dashboard
-
Your organization's name appears as the credit card descriptor on donor statements. This can be adjusted under Merchant Account > Charges will appear on statement as:

-
Receipts include your organization name, address, phone, and email.
-
The Merchant Report tab shows pending and completed transactions.
📈 Once You Are Set Up
Once setup is complete, all credit card features work as expected, including online bidding, mobile checkout, resending receipts, and batch processing.
Run a small test transaction a week or two before your event to confirm everything is working and to trigger your initial payout hold period early.
If you have questions at any point, reach out through Training/Support > Request Support and your Account Manager will be happy to help.
💡 Run a small test transaction before your event to trigger the initial 7-day hold and start payout timing.