
Tap to Pay is available for phones (Android/ios) with the M2 Reader it's Mobile phones and tablets (Android & ios) only, and is NOT laptop compatible.
BidKit Payments is ClickBid's mobile app for processing credit cards at your event. It works with the M2 card reader for tap or insert payments, and supports Tap to Pay directly on Android & iOS devices. This guide walks through getting the app installed, pairing your reader, and checking in bidders.
Looking for device compatibility, FAQs, or troubleshooting?
👉 Hyperlink here: Tap to Pay/BidKit Payments FAQ & Device Compatibility
📲 Step 1: Install the BidKit Payments App
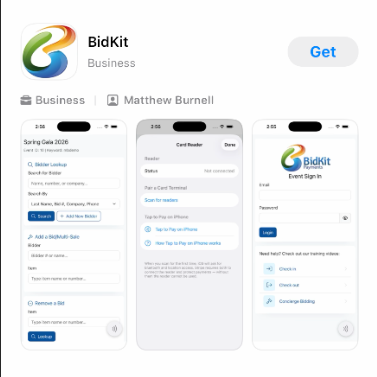
On iPhone (iOS)
- From the Apple App Store look for BidKit Payments App (or tap this link on the device you would like to use).
- Tap Install to download the app to your phone.
- When installation is complete, you will see the BidKit Payments icon on your home screen.
On Android
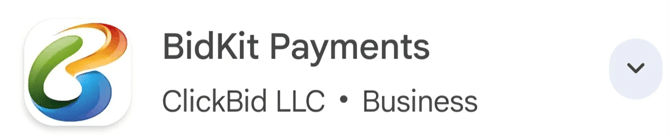
- From the Google Play Store locate BidKit Payments app (or tap this link on the device you would like to use).
- Tap Install to download the app to your phone
- Once installed, open BidKit Payments app.
🔑 Step 2: Log In to BidKit Payments
- Open the BidKit Payments app.
- Log in using your email & password for the Event.
- Enter your event keyword when prompted.
- You will land on your event's butler main screen inside the app.
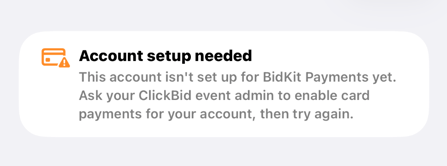
Heads Up: You must be logged into an event for Tap to Pay or the M2 puck to pair correctly. If no event is selected, the following message will display:
🔗 Step 3: Pair Your Payment Method
From the Butler main screen, locate the Card Reader field. Tap the Connect icon to open the reader selection screen, then choose one of the following:
Option A: Pair the M2 Card Reader
- Press and hold the button on the side of the M2 reader until the lights on the front start blinking and you hear a double beep. The lights will scroll back and forth, this means the reader is in pairing mode.
- In the BidKit Payments app, tap the wavelength icon in the top right corner of the screen.
- Tap Scan for Readers.
- Select M2 Reader from the list.
- When your M2 reader appears in the list, tap it to connect.
- Once connected, the icon in the top right will turn green.
💡To confirm you have the right reader paired, tap the green icon and check the serial number shown in the app. Flip the M2 reader over and find the serial number on the back, the last four digits should match. At a busy event with multiple readers, always verify the serial numbers match before you start processing cards. Consider labeling each reader with its last four digits for easy identification.
Option B: Set Up Tap to Pay
- From the reader selection screen, tap This Device (Tap to Pay).
- Wait for the status to show Ready.
ℹ️ Tap to Pay is available on both Android and iOS phones. It is not available on tablets as most tablets do not support NFC.
💳 Step 4: Check In a Bidder and Save a Card
Using the M2 Reader (iOS and Android)
- From the main screen, search for the bidder by last name and tap their record to open it.
- Confirm their first name, last name, and phone number.
- Locate the Card field. If no card is on file it will say None. Tap the down arrow next to it.
- This will slide you to the bottom of the screen where you will see the Use Card Reader button.
- Tap Use Card Reader. The M2 reader's light will turn on and the screen will prompt the bidder to tap or insert their card.
- The bidder taps or inserts their card on the reader.
- When the card is saved successfully, you will see a confirmation with the last four digits of the card number.
- Tap Complete to finish check-in. A welcome text message will be sent to the bidder automatically.
Using Tap to Pay (Android and iOS)
- After opening the event in the app, tap the wavelength icon in the top right corner.
- Tap Tap to Pay and wait for the status to show Ready.
- Search for the bidder by last name and open their record.
- Tap the down arrow next to the Card field and tap Use Card Reader.
- Hold the bidder's card behind your Android or iOS phone when prompted.
- The card will be read and saved.
- Tap Complete to finish.
ℹ️ No zip code or CVV is required when using the M2 reader or Tap to Pay. It is simply tap or insert, save, and complete.
✏️ Step 5: Manually Enter a Credit Card
If you need to type in a card number instead of using the reader:
- Open the bidder's record in the app.
- Tap Add Credit Card.
- Enter the card number, expiration date, security code, and zip code.
- Tap Complete.
💳 How to Check Out a Bidder
Once a bidder is ready to pay, you can collect their card and complete checkout all from within the BidKit Payments app.
🪪 Step 1: Add a Card
When you open a bidder's record and scroll to the checkout section, you will see the total amount due and a Payment Type dropdown. Confirm Credit Card is selected, then choose how you want to collect the card.
Option A: Use the M2 Card Reader
- Tap Use Card Reader.
- The M2 reader will light up and prompt the bidder to tap or insert their card.
- The bidder taps or inserts their card on the reader.
- Once saved, you will see the card's last four digits confirmed on screen.
Option B: Use Tap to Pay (Android)
- Tap Use Card Reader.
- When prompted, hold the bidder's card behind your Android phone.
- The card will be read and saved automatically.
Option C: Use Tap to Pay (iPhone)
- Tap Tap to Pay on iPhone.
- When prompted, hold the bidder's card on the top of your phone screen where the Tap to Pay symbol displays.
- The card will be read and saved automatically.
Option D: Enter a Card Manually
- Tap Add Credit Card.
- Enter the card number, expiration date, security code, and zip code.
- The card will be saved to the bidder's record.
💡 If the bidder already has a card on file, it will display next to Card on File. You can proceed directly to checkout without re-entering their card.
✅ Step 2: Collect Payment and Complete Checkout
Once a card is on file, you are ready to charge the bidder and complete their checkout.
- Tap Collect Payment on Card Reader to charge the card on file.
- Review the total with the bidder and confirm everything looks correct.
- Tap Complete Checkout to finalize the transaction.
- A confirmation and welcome text message will be sent to the bidder automatically.
⚠️ Tapping Complete Checkout processes the payment immediately. Make sure the correct bidder record is open and the total is accurate before confirming.
💡 If you need to stop before completing, tap Cancel to exit without processing the payment.
🔄 App Updates
When a new version of BidKit Payments is available, your phone will receive a notification. Tap the notification to update. Updates can be pushed in real time once the app is installed.